
Here are a few extra tips I've picked up from installing hundreds and hundreds of Pertronix kits over the last several years:
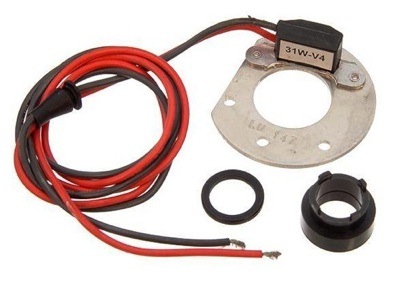
- When installing the magnetic ring on the distributor shaft, check to see if it fits loose. If it does, apply a dab of silicon sealant inside before you press it on the shaft. This will prevent the timing from shifting when the ring moves.
- Always use a small tie-strap to hold the wires down the the breaker plate. I see many failures from the wires rubbing on the trigger wheel. Once the insulation wears off, they are susceptible to shorting together, and to high voltage misfires. Instant death will happen quickly once the wires are exposed.
- Make sure the wire ends fit very tight on the coil. A loose fitting will cause the unit to fail prematurely, misfire, overheat the coil, burn up rotors, pick your poison.
- You MUST use a 3 Ohm internally ballasted coil.
- You MUST use a volt meter to check the voltage into the coil with the key on AND with the car running. You want to verify that you have a 12-14.5 volts. More or less voltage WILL damage the unit, causing premature failure. DO NOT bother using a test light. Use a meter set on 20V DC. That's the setting with the dashes, not the wave.
- If your car has been converted from positive earth to negative earth, recheck every single step of the conversion before proceeding with the installation. 50% of all Pertronix failures I see are from something that got missed. Use Barney Gaylord's site mgaguru.com to double check your work if you need to.
- Read and follow the wiring diagram. Check it 3 times from different directions before turning the key on. Work your way from the key to the distributor, then from the distirbutor to the key. Take a break, come back, match the diagram to the car once again before you start it for safe measure, as its $80 in the trash if you miss one step.
- Feel free to grind away part of the aluminum mounting bracket if it makes the installation or service of your distributor easier. Just don't carve into any plastic, and don't allow the bracket to get too hot while you're working on it.
- You can trim the wires to fit your application - they're made WAY too long so they'll fit a miriad of cars that share the same distributor.
- If you need to call Pertronix for technical support, do it twice. Hopefully you'll get 2 different guys on the phone, and you'll probably get 2 different answers. How do you determine which is correct? Tough call. Pertronix doesn't have an electrical engineer on staff. Those guys are salesmen - even the guys who answer tech calls. They have to answer calls on all makes and models of cars, so they likely won't know anything about ballast resistors on a Midget or what voltage range a Lucas generator puts out. Get a real answer from a local shop, online forum, or a specialist who can help accurately!

")


resistor??
Personal experience tells me that folks who use a 1.5 Ohm coil and external ballast resistor have much earlier failures. Many folks tend to hook up the power feed wire in the wrong place since its not specified in the Pertronix wiring diagram and that leads to a very early failure. You need 12V into the red, 3 Ohms resistance between the red and black rather than both attaching at the coil as drawn.
I don't agree with your "must have a 3 Ohm internally ballasted coil" decree. There is no danger in installing a 3.0 ohm coil in either a ballasted loom or a non-ballasted loom. There is a danger when installing the 1.5 ohm coil into a non-ballasted system. The dividing line lies about 1975/1976 when MGBs began using a "ballast wire" in the loom, and a corresponding 1.5 Ohm coil. The later MGBs (75/76 and later) will have significantly lower power to the plugs if they use a 3.0 ohm coil, for the later 75/76 and onwards MGB came from the factory with a ballasted wire in the loom.
What parts are you implying when you state a "3 Ohm internally ballasted coil". Do you mean a nominal 1.5 Ohm coil with a ballasted wiring loom, or a 3.0 Ohm coil (for any year wiring loom) with or without a ballast wire in the loom, or an external (e.g. ceramic) resistor? The Pertronix Ignitor needs 12V to its red wire, and a ground to its black wire.
UK/USA pre 1975/76 MGBs came stock with a 3 Ohm coi
static timing like you can with points installed. In a fraction of a second my control module
went up in smoke! Pull the #1 plug and watch for spark there instead.
Want to leave a comment or ask the owner a question?
Sign in or register a new account — it's free